Chainsaws are a necessity for people who work in the construction industry. When you use your chainsaw regularly, it is inevitable that sooner or later the chain will need to be replaced.
As a chainsaw user, you know the importance of having a sharp chain – it is one of the most important pieces on your saw. If your chain isn’t sharp enough, it will make cutting difficult and can cause chainsaw-related injuries like problems with kickback as well as general wear and tear on your machine. To keep yourself safe, as well as prolonging the life of your equipment, you must learn how to replace chainsaw chains.
In this chainsaw chain replacement guide, we are going to show you how to do just that! We hope that by following these steps carefully and correctly you will be able to enjoy all the benefits a new chain has for a long time!
Table of Contents
How to Replace a Chainsaw Chain? Step-by-Step Guide
Step 1: Getting Started
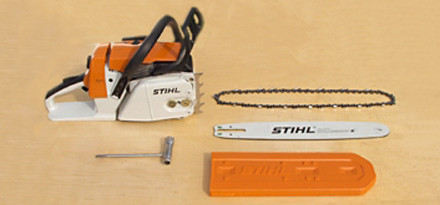
Before you start your chainsaw chain replacement, you must ensure you have all the necessary tools and materials. These will usually include:
- New chainsaw chain
- Pliers
- File
- Lubricating oil (if required)
- Flat-head screwdriver
Step 2: Get a New Chain
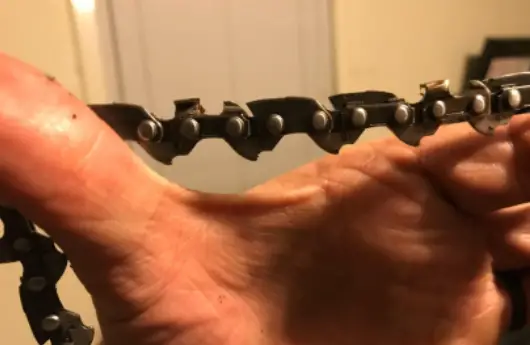
First things first you need to make sure you have a new chain. That might sound obvious, but we don’t want you to have to go through all of this work just to find out that you don’t have a new chain.
Most professional chains require you to replace them once they reach somewhere around .25 inches of wear but check the packaging that came with your saw for specific details.
Here are some tips on getting the right chain:
- Make sure to get a replacement chain that is compatible with your chainsaw model. Most chains are universal but always check the packaging.
- Just like any other industry, some brands are better than others. A quality chain will not only last longer but also offer you better performance.
- Don’t replace your chain if it is severely worn. If your chain is extremely damaged, it is probably time to get a whole new chainsaw.
- Before you buy any tools or materials, make sure to check your chainsaw’s manual. This will give you all the specific information on how to install your new chain correctly.
Also Read: Best Gas Chainsaws – Top Picks & Reviews
Step 3: Remove the Front Panel
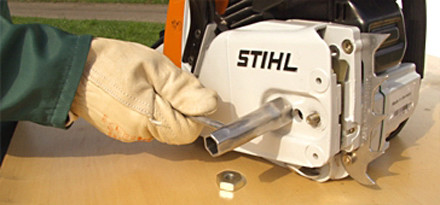
Next, you will need to remove the front panel of your chainsaw.
This should be easy. The chainsaw has one or two bolts that seal it in place, and for those with a tool-less chain tensioner, the built-in crank will come off easily after a quick glance at where they’re located on your machine to see if you want them removed from there as well!
To do this:
- Make sure your chainsaw is switched off
- Use the screwdriver to remove the front panel. This may be located on either side
- Remove all of the sprocket covers, sprocket covers, and oil ports
Step 4: Pull the Bar Off
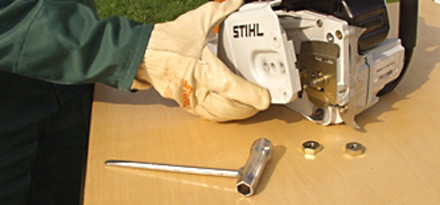
To continue with your chainsaw chain replacement, you must pull the bar off.
In order to do this, you will need to use your screwdriver to remove the bolts located at the front of the chainsaw.
Step 5: Release the Chain Tension
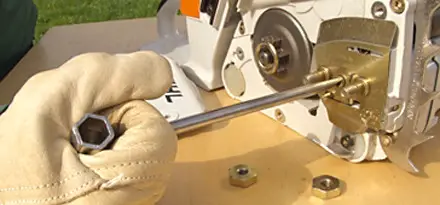
The next step is to take the bar and chain off. There’s not much holding them in place, so all you have to do is pull up on it!
Step 6: Remove the Old Chainsaw Chain
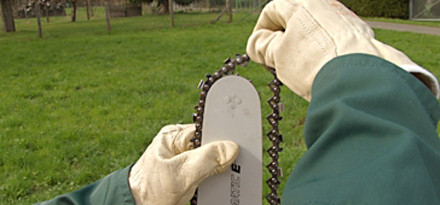
After you have removed both the bar and chain, it’s time to remove the old chainsaw chain.
In order to do this, use your pliers to remove the link lock. This can be found at the end of your old chainsaw bar and will look like a small round pin.
Once the link is removed, pull on your old chainsaw chain to get it off of the bar.
Make sure to remove all drive links and store them. You may be able to use them in the future if you decide that you want to go back to using your old chainsaw chain.
Step 7: Loosen the Tensioning Screw
Now that the old chain is completely off, you will need to loosen the tensioning screw.
This can be located on either side of your chainsaw.
After you have loosened the tensioning screw, move it away from the bar so there is a bit of slack.
You May Also Read: What Chainsaw Size Do I Need?
Step 8: Inspect and Clean the Bar
Imagine, the chainsaw gets beaten up. You use it to cut trees and other things. Once you have the slack, it’s time to inspect and clean your chainsaw bar.
First, use a file to remove all of the material from your bar. You can use a flat file to make sure you don’t damage the cutting surface on your chainsaw bar.
Once the old material is removed, use your regular or fine-grade sandpaper to make sure you get all of the scratches.
You want to make sure that the bar is smooth and free of scratches so you can maintain a good sharp edge on your chainsaw blade.
Step 9: Put the New Chain Onto the Saw
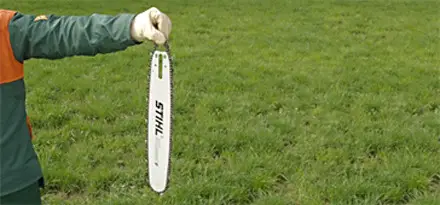
Phew! Now you’re almost there. The next step is to put the new chainsaw chain onto your saw.
Wrap the chain around your bar and make sure the side with the larger holes goes up.
You will want to line up the guide tooth on the back of the chain to your chainsaw’s drive sprocket. Make sure that both guides are set up correctly so you can maintain a good sharp edge on your blades.
Now that the guide is correctly lined up, you will need to thread the chain around the sprocket and bar.
You may need to use the pliers to tighten the chain, but if not you can do it manually with your hands.
Also, make sure that your chain is tight, and don’t forget about the chainsaw safety.
Once the new chainsaw bar and chain are ready to go, but the tensioning screw back in.
Step 10: Re-install the Front Panel
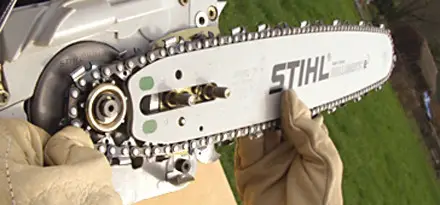
Finally, you will need to re-install the front panel of your chainsaw.
Use the flat head screwdriver to tighten all of the bolts, sprocket covers, and any other part that you removed at the beginning of this chainsaw chain replacement project.
Once the front panel is securely fastened, move on to Step 10!
Step 11: Align the Guide Bar
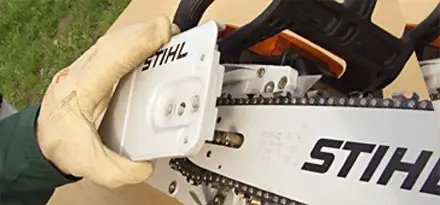
Before you start cutting, you must align your guide bar.
You will want to Loosen the tensioning screw that you tightened earlier.
Now, use the rotating handle to adjust your chainsaw guide bar.
Orient it so the guide tooth is set up with your chainsaw sprocket. You will need to go between both guides on the back of your chainsaw chain to do this.
Once your guide bar is properly aligned, tighten the tensioning screw once more. Now you’re ready to start cutting!
Also Read: How to Measure Chainsaw Bar
Step 11: Tighten the Chain to the Correct Tension
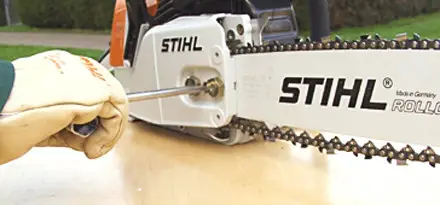
Your chainsaw chain needs to be tightened to the correct tension.
Tension is created by tightening the tensioning screw on your chainsaw bar.
If you tighten it too tight, the bar will be too hard to turn.
Too loose and your chainsaw chain could come off your bar.
Keep adjusting the tensioning screw until your chain is tight enough to stay attached but loose enough so you can still move it easily with your hands.
Step 12: Evaluate Chain Tension
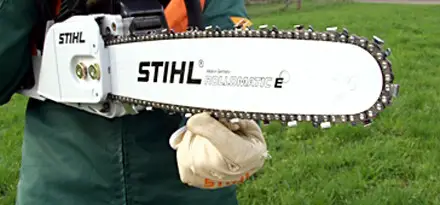
Now that you’ve replaced your chainsaw chain, it’s time to evaluate the tension.
Tips for evaluating whether you have replaced your chainsaw chain correctly or not:
- You should be able to move the chainsaw bar up and down, but it shouldn’t move from side to side.
- There should be a small amount of slack in the bar, but not enough to make a noise as it rubs on the bar.
- If you feel any noticeable resistance when you move the chainsaw, tighten the tensioning screw until the resistance is lessened.
- When you are done cutting, loosen the tensioning screw to release any pressure left in your chainsaw blade.
- Grip your chainsaw on the handle and turn the chainsaw on.
- Move your hands around to make sure that the chain stays in place.
- The blades of your chainsaw should be touching the bottom of the bar.
- Your chainsaw should not be too loose or too tight, you just need to make sure your blade is attached.
- This is a good time to check your guide bar for any scratches or damage.
Step 13: Finish!

Congratulations on replacing your chainsaw chain.
Now it’s time to get back out there and continue cutting through all sorts of materials, from metal to wood.
Frequently Asked Questions (FAQs)
How often do you need to replace a chainsaw chain?
You will need to replace the chainsaw chain every so often, and sometimes even sooner than that depending on how often you use it. A worn-out chainsaw chain will not cut efficiently and it can begin to make your saw harder to use. You should replace your chainsaw chain if it’s worn, has a lot of rust on it, or won’t spin well.
Does it matter which way you put a chain on a chainsaw?
When your Chainsaw bar is on the left side of an engine, you must know which direction their cutting edges should be facing. Counter-clockwise means they’ll do all the work for us!
Should I soak my chainsaw chain?
Don’t be afraid to get your hands dirty! It’s time for a little oil therapy. Soak the chain in bar and chain, then hang it from a hook so all of that excess can drip back into place – this will make sure everything is greased up good before you go ahead with the installation.
Conclusion
Now that you have all this equipment and know, how to put a chain on a chainsaw. The only thing left for you to do is take action. We hope that after reading this in-depth guide you feel 100% confident to go out and replace your chain. Your chainsaw will thank you for it!
Have you ever replaced a chainsaw chain? What tools and materials did you use? Let us know in the comments section below.
